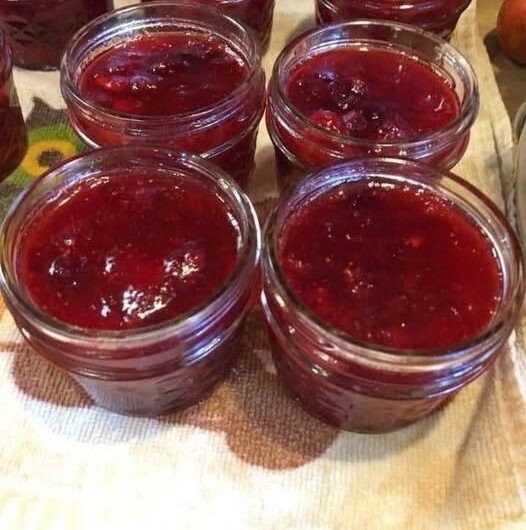
There is something incredibly rewarding about transforming fresh seasonal fruit into jars of sweet, flavorful homemade jam. This traditional fruit preserve has been enjoyed for generations and remains one of the most popular ways to capture the taste of ripe fruit at its peak. Whether made with strawberries, peaches, apricots, plums, raspberries, blueberries, or a combination of fruits, homemade jam delivers vibrant flavor, beautiful color, and a texture that simply cannot be matched by many store-bought varieties.
Making jam at home is more than just a recipe—it is a rewarding kitchen tradition that allows you to enjoy seasonal produce throughout the year. Every spoonful preserves the natural sweetness, aroma, and character of fresh fruit while creating a versatile spread that can be enjoyed in countless ways.
Why Homemade Jam Remains a Kitchen Favorite
Homemade jam continues to be one of the most beloved fruit preservation methods because it combines simplicity with incredible results. Unlike many complicated preserving techniques, jam requires only a handful of ingredients and basic kitchen equipment.
The process works by combining fruit, sugar, and acid, then cooking them together until they reach the perfect consistency. As the mixture simmers, water evaporates, flavors intensify, and natural fruit pectin helps create the thick, spreadable texture that defines a great jam.
One of the biggest advantages of homemade jam is complete control over ingredients. You can choose your favorite fruits, adjust sweetness levels, and even experiment with flavor combinations to create unique preserves tailored to your taste.
The Secret Behind Exceptional Fruit Jam
Every great batch of jam begins with high-quality fruit. Fresh, ripe fruit provides the strongest flavor, best aroma, and most appealing color.
Interestingly, slightly underripe fruit can also be beneficial. Fruit that is not fully ripe contains higher levels of natural pectin, which helps jam set properly. Many experienced jam makers combine ripe and slightly underripe fruit to achieve both outstanding flavor and ideal texture.
The natural sugars and pectin found in fruit play a vital role during cooking. Together with added sugar and lemon juice, they create the thick consistency that allows jam to spread beautifully on toast, pastries, and baked goods.
Choosing the Best Fruit for Jam Making
One of the wonderful things about homemade jam is its versatility. Nearly any fruit can be transformed into a delicious preserve.
Popular choices include:
- Fresh strawberries
- Mixed berries
- Raspberries
- Blueberries
- Blackberries
- Peaches
- Apricots
- Plums
- Cherries
- Nectarines
Each fruit brings its own unique flavor profile and texture. Berries often create rich, vibrant jams, while stone fruits such as peaches and apricots produce silky preserves with delicate sweetness.
Combining different fruits can also produce outstanding results. Mixed berry jam, for example, offers layers of sweetness, tartness, and complexity that make it especially popular.
Understanding the Role of Sugar
Sugar does much more than sweeten jam.
It performs several important functions:
- Helps preserve the fruit
- Encourages proper gel formation
- Enhances flavor
- Improves texture
- Extends shelf life
As sugar draws moisture from the fruit, it creates a natural syrup that forms the foundation of the jam-making process. This stage allows the fruit to release juices before cooking begins, resulting in better flavor development and more even cooking.
The amount of sugar used depends largely on the natural sweetness of the fruit. Tart berries may require more sugar, while naturally sweet peaches or apricots may need slightly less.
Why Lemon Juice Matters
Lemon juice is one of the most important ingredients in traditional jam recipes.
Its role extends far beyond flavor.
Lemon juice helps:
- Balance sweetness
- Brighten fruit flavors
- Support pectin activation
- Maintain color
- Improve preservation
Without sufficient acidity, some jams may struggle to achieve the desired consistency. The fresh citrus notes also help highlight the natural characteristics of the fruit rather than overwhelming them.
Preparing Fruit for Cooking
Proper preparation is essential for producing smooth, flavorful jam.
Before cooking, fruit should be thoroughly washed under cool running water. Any stems, leaves, pits, stones, bruised areas, or damaged portions should be removed.
Depending on the fruit:
- Strawberries can be halved or quartered.
- Peaches may be peeled and diced.
- Apricots should be pitted and chopped.
- Plums should be destoned and finely cut.
- Berries may be left whole or lightly crushed.
Uniform fruit pieces encourage even cooking and consistent texture throughout the finished preserve.
The Importance of Fruit Maceration
One of the most valuable yet often overlooked steps in jam making is maceration.
This simply means allowing the fruit and sugar to rest together before cooking.
During this period:
- Fruit releases juices naturally.
- Sugar begins dissolving.
- Flavor develops.
- Cooking becomes more efficient.
After one to three hours of resting, the fruit typically appears glossy and surrounded by a flavorful syrup. This stage creates a stronger fruit flavor and often reduces cooking time.
Building Flavor Through Gentle Cooking
Once the fruit has released its juices, the cooking process begins.
The fruit mixture should be heated gradually over medium heat while being stirred continuously. The goal is to completely dissolve the sugar before the mixture reaches a boil.
Allowing sugar crystals to remain undissolved can sometimes lead to crystallization in the finished jam. Slow heating prevents this problem and creates a smoother texture.
As the fruit warms, aromas become more pronounced and the ingredients begin to blend into a cohesive mixture.
Reaching the Perfect Boil
After the sugar dissolves completely, the heat can be increased until the jam reaches a rolling boil.
A rolling boil is strong and vigorous, continuing even while the mixture is stirred.
At this stage:
- Water begins evaporating rapidly.
- Fruit softens.
- Pectin activates.
- Flavors become concentrated.
The transformation from fresh fruit to jam becomes visible as the mixture thickens and deepens in color.
Managing Foam During Cooking
Foam commonly develops on the surface while jam cooks.
Although harmless, excess foam can affect the appearance of finished preserves.
Using a spoon to skim away foam creates a clearer, brighter jam with a more professional appearance. This simple step contributes significantly to the visual quality of homemade preserves.
How Jam Thickens Naturally
As cooking continues, moisture gradually evaporates.
This process concentrates:
- Fruit flavor
- Natural sugars
- Pectin
The fruit begins breaking down while the liquid becomes thicker and glossier.
The exact cooking time depends on:
- Fruit variety
- Fruit moisture content
- Batch size
- Pot size
- Cooking temperature
Most batches require between 20 and 45 minutes to achieve proper consistency.
Testing for Perfect Jam Consistency
Knowing when jam is finished is one of the most important skills in home preserving.
Frozen Plate Method
A chilled plate offers a reliable way to test readiness.
Place a small plate in the freezer before cooking begins.
When the jam appears thick:
- Spoon a small amount onto the cold plate.
- Wait 30 seconds.
- Push the jam gently with a finger.
If the surface wrinkles and remains in place, the jam is ready.
If it flows easily, continue cooking and test again.
Spoon Method
Another classic technique involves observing how jam falls from a spoon.
Properly cooked jam drops in thick sheets rather than thin, watery streams.
Both tests help ensure the finished preserve achieves a spreadable texture without becoming overly stiff.
Sterilizing Jars for Long-Term Storage
Safe storage begins with properly sterilized jars.
Clean glass jars and lids should be washed thoroughly using hot soapy water and rinsed completely.
They can then be sterilized by:
- Boiling for 10 minutes
- Heating in a low-temperature oven
Warm jars are less likely to crack when filled with hot jam and help maintain proper food safety standards.
Filling and Sealing the Jars
Once the jam reaches the desired consistency, it should be removed from the heat and allowed to rest briefly.
Using a ladle, carefully transfer the hot jam into warm jars.
Leave approximately ½ centimeter of headspace at the top.
Clean jar rims before sealing to ensure proper closure.
As jars cool, a vacuum seal forms that helps protect the preserve during storage.
Storing Homemade Fruit Jam
Correct storage helps maintain freshness and quality.
Store sealed jars in:
- A cool location
- A dry environment
- A dark pantry or cupboard
Properly sealed homemade jam can often remain shelf-stable for up to one year.
After opening, refrigerate immediately and enjoy within several weeks for the best flavor and quality.
Creative Flavor Variations
Homemade jam provides endless opportunities for customization.
Popular additions include:
- Vanilla bean
- Ground cinnamon
- Fresh ginger
- Cardamom
- Orange zest
- Lemon zest
These ingredients enhance fruit flavor while creating unique preserves suitable for gifts and special occasions.
Mixed Berry Jam Variation
For a rich berry preserve, combine:
- Strawberries
- Raspberries
- Blueberries
This combination produces a beautifully colored jam with balanced sweetness and tanginess. The result is a vibrant preserve that pairs wonderfully with breakfast foods, desserts, pastries, and baked treats.
Final Thoughts
Traditional homemade jam is one of the most rewarding kitchen projects for fruit lovers. With fresh fruit, sugar, lemon juice, and a little patience, you can create flavorful preserves that showcase the best qualities of seasonal produce. Whether spread on warm toast, spooned over yogurt, layered into cakes, or served alongside pastries, homemade jam offers a taste of summer that can be enjoyed throughout the year.
Part 2: Simple Recipe Format
Traditional Homemade Fruit Jam
Prep Time
20 minutes
Resting Time
1–3 hours
Cook Time
20–45 minutes
Total Time
Approximately 2–4 hours
Yield
6–8 medium jars
Ingredients
- 2 kilograms fresh ripe fruit (strawberries, mixed berries, peaches, apricots, plums, or preferred fruit)
- 1.5–2 kilograms granulated sugar
- 4 tablespoons fresh lemon juice
- 1 cup water (only if using less juicy fruits)
Equipment
- Large heavy-bottom saucepan or preserving pot
- Wooden spoon
- Sharp knife
- Cutting board
- Measuring cups
- Glass preserving jars with lids
- Ladle
- Small chilled plate
- Clean kitchen towels
Instructions
- Wash and prepare the fruit by removing stems, leaves, pits, or damaged sections.
- Chop large fruits into small pieces; leave berries whole or lightly crush them.
- Place fruit into a large cooking pot.
- Add sugar and stir well to combine.
- Let the mixture rest for 1–3 hours until juices develop.
- Place the pot over medium heat.
- Stir continuously until all sugar dissolves.
- Add lemon juice and mix thoroughly.
- Increase heat and bring to a rolling boil.
- Skim off any foam that forms on the surface.
- Continue cooking for 20–45 minutes, stirring frequently.
- Test consistency using the cold plate method.
- Once ready, remove from heat and rest for 5 minutes.
- Fill sterilized warm jars, leaving about ½ cm headspace.
- Wipe rims clean and secure lids tightly.
- Cool completely at room temperature.
- Check seals before storing.
Storage
Pantry: Up to 1 year when properly sealed.
Refrigerator (after opening): Consume within several weeks.
Recipe Notes
- Use fruit at peak ripeness for the best flavor.
- Slightly underripe fruit helps improve natural pectin levels.
- Avoid overcooking to maintain bright color and fresh fruit taste.
- Small batches often provide superior texture.
- Add vanilla, cinnamon, ginger, cardamom, or citrus zest for flavor variations.
- Combine different fruits for unique homemade preserves.
Mixed Berry Jam Variation
Ingredients
- 1 kilogram strawberries
- 500 grams raspberries
- 500 grams blueberries
- 1.8 kilograms granulated sugar
- 4 tablespoons lemon juice
Follow the same cooking and preserving method above.