There is something truly satisfying about preparing homemade vanilla ice cream from scratch. Every scoop offers a rich, creamy texture and fresh dairy flavor that simply cannot be matched by many commercially produced frozen desserts. When you prepare ice cream in your own kitchen, you know exactly what goes into every batch. From fresh cream to real vanilla, each ingredient plays an important role in creating a delicious dessert that everyone can enjoy.
Unlike many packaged ice creams that may contain preservatives, artificial flavors, or stabilizers, this homemade version focuses on simple pantry staples. The result is a naturally creamy frozen treat with a smooth consistency and authentic vanilla aroma. Whether you are preparing dessert for a family gathering, a birthday celebration, or simply treating yourself after dinner, this recipe delivers wonderful results every time.
One of the biggest advantages of homemade ice cream is its flexibility. Once you learn the basic vanilla base, you can customize it with your favorite fruits, chocolate, cookies, nuts, or sauces. It becomes a recipe that grows with your creativity and allows you to enjoy endless flavor combinations throughout the year.
Why Homemade Ice Cream Is Worth Making
Homemade vanilla ice cream offers more than just incredible taste. It provides a rewarding cooking experience that is enjoyable for beginners and experienced home cooks alike. The recipe requires only a handful of ingredients, making it surprisingly easy to prepare without complicated techniques.
Because you control the sweetness and quality of ingredients, you can create a dessert that perfectly matches your family’s preferences. Fresh cream produces a luxurious mouthfeel, while pure vanilla extract gives the ice cream its classic aroma without artificial aftertastes.
Preparing ice cream at home is also an enjoyable activity for children and adults. Mixing ingredients, watching the base transform into soft frozen cream, and choosing favorite mix-ins creates wonderful kitchen memories that everyone will remember.
Another benefit is freshness. Homemade ice cream is served shortly after preparation, giving it a cleaner and richer flavor than products that may spend months in storage before reaching grocery shelves.
What Makes This Vanilla Ice Cream Special?
Many traditional ice cream recipes require egg yolks and careful cooking to prepare a custard base. Although custard-style ice cream is delicious, it can seem intimidating for many beginners because overheating the eggs may cause them to curdle.
This recipe uses an easy egg-free method while still producing a wonderfully creamy texture. By using the proper balance of heavy cream and whole milk, you achieve a smooth consistency without the extra cooking steps.
The simplicity of this method makes it ideal for first-time ice cream makers. Whether you own an ice cream machine or prefer the no-churn freezing method, the results remain rich, creamy, and satisfying.
The clean vanilla flavor also makes this recipe an excellent foundation for countless homemade ice cream variations.
Choosing High-Quality Ingredients
Although the ingredient list is short, quality makes a noticeable difference.
Heavy whipping cream provides richness because of its higher butterfat content. This fat creates the silky texture that makes premium ice cream so enjoyable.
Whole milk balances the richness while keeping the dessert smooth instead of overly heavy.
Granulated sugar not only sweetens the mixture but also contributes to the final texture. Properly dissolved sugar helps reduce the formation of large ice crystals during freezing.
Pure vanilla extract or vanilla bean paste creates the signature flavor. Using genuine vanilla instead of imitation flavoring produces a deeper, warmer aroma that enhances every bite.
A tiny pinch of fine sea salt might seem insignificant, but it actually helps balance sweetness and intensifies the natural vanilla flavor.
The Science Behind Smooth Homemade Ice Cream
Great ice cream depends on more than simply freezing dairy.
As the mixture freezes, water naturally forms ice crystals. Large crystals create a grainy texture, while smaller crystals produce the creamy consistency everyone loves.
Several factors help reduce crystal formation:
- Fully dissolving the sugar
- Keeping all dairy ingredients thoroughly chilled
- Mixing during freezing
- Using high-fat cream
- Freezing the finished ice cream quickly
These simple techniques allow home cooks to produce excellent results even without commercial equipment.
Why Chilling the Base Is Important
One of the most overlooked steps in homemade ice cream is chilling the liquid mixture before freezing.
Allowing the base to rest in the refrigerator for at least thirty minutes cools every ingredient evenly. A colder mixture freezes faster, reducing the amount of time available for large ice crystals to develop.
Professional ice cream makers often chill their base for several hours or overnight because the extra resting time produces an even smoother dessert.
Although this recipe only requires thirty minutes of chilling, extending the refrigeration time can improve both flavor and texture.
Ice Cream Machine vs. No-Churn Method
Many people assume an expensive ice cream machine is necessary, but that is not always true.
An ice cream maker continuously stirs the mixture while freezing it, incorporating tiny air bubbles that create a light and creamy texture.
However, if you do not own a machine, the freezer method works remarkably well. By removing the mixture every thirty minutes and stirring vigorously, you break apart forming ice crystals and mimic much of the machine’s action.
Both methods produce delicious results, making this recipe accessible to nearly everyone.
Endless Flavor Possibilities
After mastering the vanilla version, you can easily personalize future batches.
Popular additions include chocolate chips, crushed chocolate sandwich cookies, caramel sauce, brownie pieces, chopped roasted nuts, colorful sprinkles, fresh berries, peaches, mangoes, coffee syrup, peanut butter swirls, or mini marshmallows.
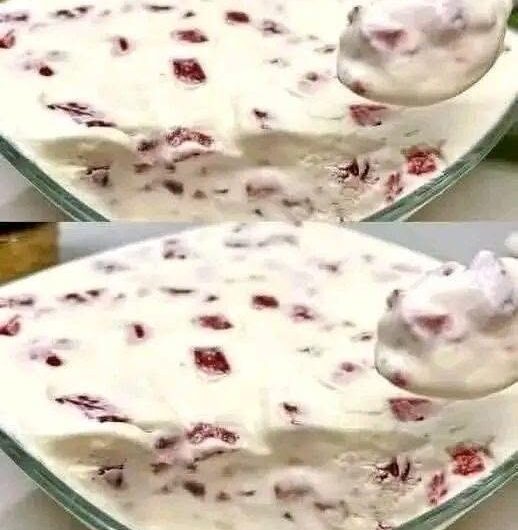
Seasonal ingredients also work beautifully. During summer, fresh strawberries or peaches create refreshing fruit ice cream. In autumn, cinnamon and caramel produce warm comforting flavors. Winter holidays are perfect for peppermint pieces or crushed candy canes.
Because the vanilla base has such a mild flavor, almost any mix-in complements it wonderfully.
Perfect Occasions for Homemade Ice Cream
This dessert fits almost every celebration.
Serve it after family dinners, birthday parties, anniversaries, graduation celebrations, picnics, holiday gatherings, or weekend barbecues.
It pairs beautifully with brownies, apple pie, chocolate cake, fruit cobblers, waffles, pancakes, or freshly baked cookies.
Even a simple bowl topped with fresh fruit becomes an elegant dessert suitable for guests.
Homemade vanilla ice cream also makes thoughtful gifts when packed into insulated containers for close friends and family.
Helpful Tips for Outstanding Results
Using chilled bowls and utensils helps keep the mixture cold throughout preparation.
Avoid over-whipping the cream before combining it with the milk because excessive air can affect the final texture.
Always cover the surface of stored ice cream with plastic wrap or wax paper before sealing the container. This simple step minimizes freezer burn and prevents unwanted ice crystals.
Store the ice cream in shallow freezer-safe containers instead of very deep ones. Shallower containers freeze more evenly.
For easier scooping, allow the container to sit at room temperature for two to five minutes before serving.
Common Mistakes to Avoid
Many homemade ice cream problems are easy to prevent.
Adding warm ingredients slows freezing and encourages crystal formation.
Skipping the chilling step often results in a less creamy texture.
Using low-fat dairy produces a firmer, icier dessert because fat contributes significantly to smoothness.
Adding fresh fruit with excessive moisture may introduce extra water. Pat chopped fruit dry with paper towels before folding it into the ice cream.
Overmixing after adding chocolate chips or cookies may crush delicate mix-ins and affect appearance.
Storage Recommendations
Proper storage helps preserve freshness.
Transfer the finished ice cream into an airtight freezer-safe container immediately after preparation.
Place a sheet of wax paper or plastic wrap directly against the surface before sealing the lid. This reduces air exposure and helps maintain a creamy consistency.
For the best flavor, enjoy homemade ice cream within two weeks. Although it remains safe longer when properly frozen, freshness gradually decreases over time.
Always use a clean scoop to avoid introducing moisture into the container.
Frequently Asked Questions
Can I make this recipe without an ice cream machine?
Yes. The freezer-and-stir method creates delicious homemade ice cream using ordinary kitchen equipment.
Can I use vanilla bean paste?
Absolutely. Vanilla bean paste adds beautiful specks of real vanilla while producing a deeper flavor.
Why did my ice cream become hard?
Homemade ice cream contains fewer commercial stabilizers, so it naturally freezes firmer. Allow it to soften for several minutes before scooping.
Can I reduce the sugar?
You may slightly reduce the sugar, but keep in mind that sugar also affects texture. Using too little can make the ice cream harder and icier.
What mix-ins work best?
Chocolate chips, cookie pieces, chopped strawberries, toasted pecans, brownies, caramel ribbons, and colorful sprinkles are excellent choices.
Final Thoughts
Making homemade vanilla ice cream is one of the most rewarding dessert projects you can try. With only a few everyday ingredients, you can prepare an incredibly creamy frozen dessert that tastes fresh, rich, and naturally delicious. Whether enjoyed plain or customized with your favorite mix-ins, this recipe offers endless opportunities to create memorable desserts for every season.
Every batch reflects the care and quality that comes from preparing food at home. From the first whisk to the final scoop, the process is simple, relaxing, and enjoyable. Once you discover how easy it is to make creamy homemade ice cream, it is likely to become a favorite recipe that your family requests again and again.
In Part 2, you’ll find the easy-to-follow recipe card with ingredients, step-by-step instructions, preparation times, nutrition information, storage tips, and serving suggestions.
Part 2 – Homemade Ice Cream Recipe Card
Homemade Ice Cream
A rich, smooth, and creamy homemade ice cream made with fresh dairy, pure vanilla, and simple pantry ingredients. This easy recipe can be prepared with or without an ice cream maker, making it perfect for beginners and dessert lovers alike.
Recipe Details
- Preparation Time: 15 Minutes
- Chilling Time: 30 Minutes
- Churning Time: 20–25 Minutes (or 3 hours using the no-machine method)
- Freezing Time: 4–6 Hours
- Total Time: Approximately 6–7 Hours
- Servings: 6–8
- Course: Dessert
- Cuisine: American
- Difficulty: Easy
Ingredients
For the Vanilla Ice Cream Base
- 2 cups heavy whipping cream (high-fat content)
- 1 cup whole milk (full-fat milk preferred)
- ¾ cup white granulated sugar
- 1 tablespoon pure vanilla extract or vanilla bean paste
- 1 pinch fine sea salt
Optional Mix-Ins
- ½ cup semi-sweet chocolate chips
- ½ cup crushed chocolate sandwich cookies
- ½ cup chopped fresh strawberries
- ½ cup rainbow sprinkles
Optional Authentic Flavor Enhancements (Optional)
- Seeds from 1 vanilla bean
- ¼ cup toasted chopped pecans
- ¼ cup toasted almonds
- 2 tablespoons caramel sauce
- 2 tablespoons chocolate fudge sauce
Instructions
Step 1: Dissolve the Sugar
In a large mixing bowl, combine the cold whole milk and granulated sugar. Whisk for 3–4 minutes until the sugar has completely dissolved.
Add the vanilla extract and sea salt, then whisk again until the mixture is smooth.
Step 2: Mix in the Cream
Pour the chilled heavy whipping cream into the milk mixture.
Gently stir with a spatula until fully combined. Do not over-whisk, as the cream should remain liquid.
Cover the bowl and refrigerate for at least 30 minutes.
Step 3: Churn the Ice Cream
Using an Ice Cream Maker
Pour the chilled mixture into the machine while it is running.
Churn for 20–25 minutes, or according to your manufacturer’s instructions, until the mixture resembles soft-serve ice cream.
Step 4: No Ice Cream Maker Method
Transfer the chilled mixture to a freezer-safe container.
Freeze for 45 minutes.
Remove the container and beat the mixture thoroughly using a fork, whisk, or hand mixer.
Return it to the freezer.
Repeat every 30 minutes for approximately 3 hours until the ice cream becomes smooth and creamy.
Step 5: Add Mix-Ins
Fold in chocolate chips, crushed cookies, chopped strawberries, sprinkles, or your favorite additions.
Mix gently until evenly distributed.
Step 6: Freeze Until Firm
Transfer the soft ice cream into an airtight freezer-safe container.
Place plastic wrap or wax paper directly on the surface before sealing with the lid.
Freeze for another 4–6 hours until firm.
Allow the ice cream to sit at room temperature for 2–5 minutes before scooping.
Serving Ideas
Enjoy your homemade vanilla ice cream with:
- Warm brownies
- Chocolate cake
- Apple pie
- Peach cobbler
- Fresh berries
- Waffles
- Pancakes
- Chocolate syrup
- Caramel drizzle
- Whipped cream
- Chopped roasted nuts
Storage
- Store in an airtight freezer-safe container.
- Keep covered to prevent ice crystals from forming.
- Best enjoyed within 2 weeks for optimal flavor and texture.
Helpful Tips
- Use chilled dairy ingredients for a creamier texture.
- Refrigerate the mixture before freezing.
- Pure vanilla extract provides the best flavor.
- Toast nuts before adding them for extra crunch.
- Avoid adding watery fruit without patting it dry first.
- Let the ice cream soften slightly before serving for easier scooping.
Approximate Nutrition (Per Serving)
- Calories: 310 kcal
- Carbohydrates: 25g
- Protein: 3g
- Fat: 23g
- Saturated Fat: 14g
- Cholesterol: 85mg
- Sodium: 55mg
- Sugar: 24g
- Fiber: 0g
- Calcium: 10% Daily Value
Nutrition values are estimates and may vary depending on optional ingredients.
Frequently Asked Questions
Can I make this recipe without an ice cream maker?
Yes. Follow the no-machine freezing method by stirring the mixture every 30 minutes until creamy.
Why is homemade ice cream firmer than store-bought?
Homemade ice cream contains fewer stabilizers and preservatives, so it naturally freezes harder. Let it rest at room temperature for a few minutes before serving.
Can I make different flavors?
Absolutely. Add fruit, chocolate, nuts, caramel, cookie pieces, coffee, or other favorite mix-ins to create your own custom flavors.
How long does homemade ice cream stay fresh?
It tastes best within two weeks when stored properly in an airtight container.
Recipe Summary
This easy homemade vanilla ice cream recipe creates a rich, creamy, and delicious frozen dessert using everyday ingredients. Whether prepared with an ice cream maker or the no-churn freezer method, it’s a simple recipe that delivers smooth texture, classic vanilla flavor, and endless customization options for every occasion.