Homemade bread has always been a comforting staple across cultures, but with modern kitchen appliances like the air fryer, baking fresh bread has become faster, easier, and more accessible than ever. If you’ve been searching for an easy air fryer bread recipe, no-oven bread method, or quick homemade bread, this guide will walk you through everything you need to know—step by step, with practical tips and techniques to ensure success.
Why Make Bread in an Air Fryer?
The air fryer isn’t just for fries and snacks—it’s a powerful mini convection oven. It circulates hot air evenly, creating a beautifully baked loaf with a golden crust and soft interior. For those without access to a traditional oven or anyone looking for a quicker baking option, air fryer bread is a game-changer.
Benefits of air fryer bread:
- Faster cooking time compared to conventional ovens
- Energy-efficient and compact
- Perfect for small batches
- Ideal for beginners learning bread-making
- Creates a crisp crust with a fluffy inside
Understanding the Basics of Bread Making
Before diving into the recipe, it’s important to understand the key elements that make bread successful.
1. Flour – The Foundation
Flour provides structure. All-purpose flour works perfectly for this recipe, but bread flour can also be used for a slightly chewier texture due to its higher protein content.
2. Yeast – The Rising Agent
Yeast is what makes your bread rise. It feeds on sugar and releases carbon dioxide, creating air pockets that make the bread soft and airy. Instant yeast or active dry yeast both work well.
3. Liquid – Activating the Dough
Warm water or milk activates the yeast and hydrates the flour. The temperature should be warm (not hot), around 37–40°C, to avoid killing the yeast.
4. Sugar – Fuel for Yeast
Sugar helps activate yeast and enhances flavor. Even a small amount can significantly improve texture and browning.
5. Salt – Flavor Enhancer
Salt balances flavor and strengthens the dough structure. Without it, bread tastes flat.
6. Fat – Softness and Moisture
Oil or butter adds richness and keeps the bread soft. It also helps improve shelf life.
Step-by-Step Breakdown of the Process
Activating the Yeast
Start by combining warm water, sugar, and yeast. Let it sit for 5–10 minutes until it becomes foamy. This step confirms your yeast is active and ready to use.
Mixing the Dough
In a large bowl, combine flour and salt. Gradually add the yeast mixture and oil, mixing until a soft dough forms. The dough should be slightly sticky but manageable.
Kneading the Dough
Kneading develops gluten, which gives bread its structure. Knead the dough for about 8–10 minutes until smooth and elastic. If you press it lightly, it should bounce back.
First Rise (Proofing)
Place the dough in a lightly greased bowl, cover it, and let it rest in a warm place for 1–2 hours until it doubles in size. This step is crucial for fluffy bread.
Shaping the Dough
Once risen, gently punch down the dough to release air. Shape it into a round or oval loaf depending on your air fryer basket size.
Second Rise
Allow the shaped dough to rest again for 20–30 minutes. This helps improve texture and volume.
Air Fryer Baking Tips for Perfect Bread
- Preheat your air fryer for even cooking
- Use parchment paper to prevent sticking
- Avoid overcrowding—air circulation is key
- Check halfway through to prevent over-browning
- Cover loosely with foil if the top browns too quickly
Common Mistakes to Avoid
- Using hot water for yeast – kills the yeast
- Skipping kneading – results in dense bread
- Not allowing enough rising time – leads to flat bread
- Too much flour – makes bread dry
- Incorrect temperature – can burn outside while inside remains uncooked
Flavor Variations You Can Try
Once you master the basic recipe, you can customize your bread:
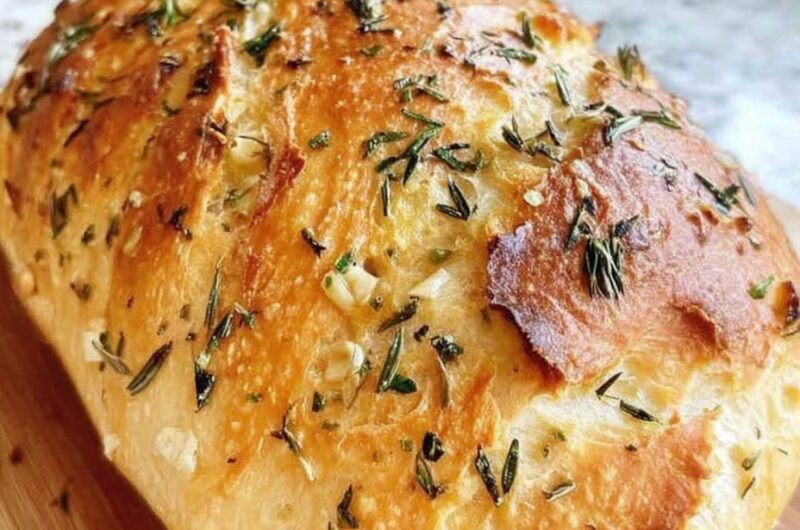
- Add garlic and herbs for a savory twist
- Mix in cheese for a rich flavor
- Use whole wheat flour for a healthier option
- Add seeds like sesame or flax for texture
- Sweeten with honey or raisins for a dessert-style loaf
Serving Suggestions
Fresh air fryer bread pairs beautifully with:
- Butter or margarine
- Jam or honey
- Soups and stews
- Sandwich fillings
- Tea or coffee
Storage Tips
- Store in an airtight container at room temperature for up to 2 days
- Refrigerate for up to 5 days
- Freeze slices for up to 1 month
- Reheat in air fryer for a fresh taste
Why This Recipe Works
This method combines traditional bread-making techniques with modern air fryer convenience. The controlled heat circulation ensures even baking, while the carefully balanced ingredients guarantee a soft, fluffy interior with a slightly crisp crust.
Whether you’re a beginner or an experienced home cook, this recipe is designed to be foolproof, efficient, and delicious.
Part 2: Simple Air Fryer Bread Recipe (Quick Version)
Ingredients
- 2 cups all-purpose flour
- 1 teaspoon salt
- 1 tablespoon sugar
- 1 teaspoon instant yeast
- 3/4 cup warm water (or warm milk for richer taste)
- 1 tablespoon oil or melted butter
(Optional additions: garlic powder, herbs, sesame seeds, or cheese)
Instructions
- In a bowl, mix warm water, sugar, and yeast. Let it sit for 5–10 minutes until foamy.
- In another bowl, combine flour and salt.
- Add the yeast mixture and oil to the flour. Mix until a dough forms.
- Knead the dough for 8–10 minutes until smooth.
- Cover and let it rise in a warm place for 1–2 hours until doubled in size.
- Shape the dough into a small loaf or round ball.
- Let it rest again for 20–30 minutes.
- Preheat air fryer to 160°C (320°F).
- Place the dough in the air fryer basket lined with parchment paper.
- Cook for 15–20 minutes until golden brown.
- Let it cool slightly before slicing.