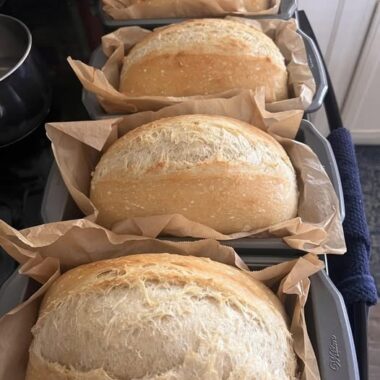
Making truly soft, fluffy gluten-free bread at home is often seen as difficult—but with the right balance of ingredients and technique, you can create a bakery-style loaf that is light, airy, and perfect for sandwiches. This recipe is designed to help you achieve a moist gluten-free bread loaf with a tender crumb, stable structure, and a mild flavor that works beautifully for everyday meals.
Unlike traditional wheat bread, gluten-free bread does not rely on gluten for elasticity or structure. Instead, it uses a carefully engineered combination of starches, binders, hydration, and yeast fermentation to create lift and softness. This approach is essential for anyone following a gluten-free diet, especially individuals managing gluten intolerance or Celiac disease.
Over the last decade, gluten-free baking has evolved significantly, especially in modern home baking and artisan kitchens. Today, we understand that gluten-free bread is not about kneading—it is about creating a structured batter that sets into a loaf during baking.
Why This Gluten-Free Bread Recipe Works So Well
This homemade gluten-free bread is designed to be:
- Soft and fluffy like traditional bakery bread
- Moist without being sticky or gummy
- Strong enough for slicing and sandwiches
- Light with an airy crumb structure
- Free from wheat gluten while still satisfying
The secret lies in balancing hydration with binding agents so the dough behaves like a thick batter rather than a traditional elastic dough.
Understanding Gluten-Free Baking (Simple Breakdown)
Before baking, it’s important to understand how gluten-free bread works differently:
In regular bread:
- Gluten forms a stretchy network
- It traps gas from yeast
- It gives structure and chew
In gluten-free bread:
- We replace gluten using plant-based binders
- We rely on starches to build structure
- We use hydration to keep bread soft
- We control fermentation carefully
This means gluten-free bread is a science of structure building, not kneading.
Core Structure System of This Bread
This recipe is built on four essential pillars:
1. Flour Base System
A gluten-free flour blend creates the foundation of the bread. It provides structure, bulk, and neutral flavor.
2. Binding System (Gluten Replacement)
Since gluten is missing, we use psyllium husk or xanthan gum to mimic elasticity and hold gas bubbles inside the dough.
3. Hydration System
Higher moisture levels are required to activate starches and binders, creating a soft crumb.
4. Fermentation System
Yeast produces carbon dioxide, which expands the dough and creates air pockets.
Ingredients You Will Need (Functional Breakdown)
Dry Base (Structure Foundation)
- 2 cups gluten-free flour blend
This forms the base of the loaf and provides structure.
Binder (Key Elasticity Element)
- 1 tbsp psyllium husk OR 1 tsp xanthan gum
This replaces gluten by trapping air and creating flexibility.
Yeast (Rising Agent)
- 2 tsp active dry yeast
Responsible for fermentation and rise.
Liquid Component
- 1½ cups warm water or milk
Hydrates flour and activates yeast.
Fat Component
- 2–3 tbsp oil or butter
Improves softness, flavor, and shelf life.
Sweetener
- 1 tbsp sugar
Feeds yeast and supports browning.
Salt
- 1 tsp salt
Balances flavor and strengthens structure.
Optional authentic additions:
- 1 tbsp honey (slightly sweeter loaf)
- 1 tsp apple cider vinegar (improves texture)
- Seeds (sunflower, flax, chia for crunch)
Step-by-Step Method for Soft Gluten-Free Bread
Step 1: Activate the Yeast (Essential Rise Preparation)
In a bowl, combine warm water or milk with sugar and active dry yeast.
Stir gently and let it rest for 8–10 minutes.
You should see a foamy layer forming on top—this means the yeast is alive and active. If no foam appears, the yeast may be expired.
Step 2: Prepare the Binder Gel (Critical Texture Step)
If using psyllium husk, mix it with a small amount of water and let it sit for a few minutes.
It will turn into a gel-like substance.
This gel is extremely important because it mimics gluten by:
- Holding moisture
- Creating elasticity
- Stabilizing air bubbles
If using xanthan gum, it will be added directly to dry ingredients.
Step 3: Combine Dry Ingredients
In a large mixing bowl, add:
- Gluten-free flour blend
- Salt
- Xanthan gum (if using instead of psyllium)
Mix well so everything is evenly distributed.
Step 4: Build the Dough Structure
Now add the following into the dry mixture:
- Activated yeast mixture
- Psyllium gel (if using psyllium husk)
- Oil or melted butter
Mix thoroughly using a spoon or spatula.
The mixture will NOT look like normal dough—it should resemble a thick, sticky batter.
This is completely correct for gluten-free bread.
Step 5: Shape and Transfer to Baking Pan
Grease a loaf pan lightly.
Pour the batter into the pan.
Use a wet spatula to smooth the surface.
Tap the pan gently to remove air bubbles.
Step 6: First Rise (Proofing Stage)
Cover the pan with a cloth and let it rise in a warm place.
Allow it to double in size.
This usually takes 45–60 minutes.
Do not overproof, or the structure may collapse during baking.
Step 7: Baking the Bread
Preheat oven to medium-high temperature.
Bake until:
- The top is golden brown
- The loaf feels firm when touched
- A toothpick comes out mostly clean
During baking:
- Gas expands inside the loaf
- Starches gelatinize
- Structure becomes stable
This is where the bread transforms from batter into a real loaf.
Step 8: Cooling Phase (Most Important Step)
Remove bread from oven and let it cool completely before slicing.
This step is essential because:
- The structure is still setting
- Moisture is redistributing
- Cutting too early causes gumminess
Let it cool for at least 45 minutes.
Texture and Taste Profile of Finished Bread
A perfect gluten-free loaf should be:
- Soft and airy inside
- Slightly chewy but not dense
- Moist but not sticky
- Lightly golden crust
- Mild and neutral in flavor
It should feel like a classic sandwich bread suitable for daily use.
Expert Tips for Best Gluten-Free Bread Results
- Always measure ingredients accurately
- Use fresh yeast for proper rise
- Psyllium husk gives the best elasticity
- Avoid overmixing after combining ingredients
- Do not skip cooling time
- Keep hydration high for softness
Common Baking Problems and Fixes
Dense Bread
Cause: Low hydration or weak yeast
Fix: Increase liquid and ensure yeast is active
Gummy Texture
Cause: Underbaking or slicing too early
Fix: Bake longer and cool fully
Crumbly Bread
Cause: Missing binder
Fix: Add psyllium husk or xanthan gum
Flat Loaf
Cause: Overproofing
Fix: Reduce rising time
Storage and Freshness Guide
- Room temperature: 2 days
- Refrigerator: 4–5 days
- Freezer: up to 2 months
Reheat slices lightly for best texture.
Serving Ideas for Gluten-Free Bread
This bread works perfectly for:
- Sandwiches
- Toast with butter
- Egg breakfast toast
- Jam or peanut butter spread
- Grilled sandwiches
It is versatile enough for both sweet and savory meals.
Final Thoughts
This fluffy gluten-free bread recipe proves that you do not need gluten to achieve bakery-quality softness and structure. With the right balance of flour blends, hydration, and natural binders, you can create a loaf that is light, stable, and satisfying.
It is a great example of modern baking science, where ingredients are carefully engineered to replace gluten’s function while still delivering excellent taste and texture.