A Bakery-Style Bread You Can Easily Make at Home
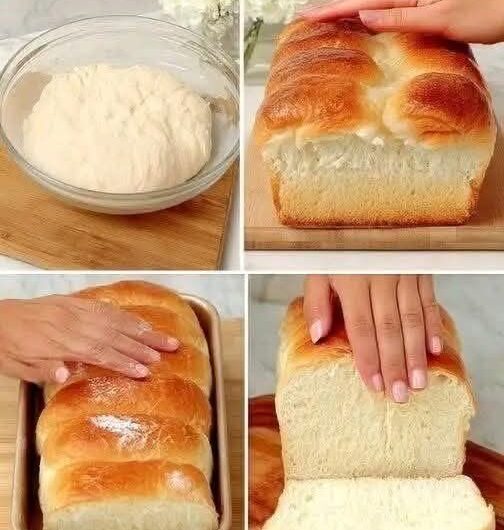
If you’ve ever searched for the softest homemade bread recipe, the best fluffy milk bread, or a Japanese bakery-style loaf, this Japanese Milk Bread recipe is exactly what you need. Known worldwide for its cloud-like texture and delicate sweetness, this bread is a true masterpiece of baking science and craftsmanship.
Often referred to as Shokupan, this bread stands out because of its unbelievably soft crumb, light texture, and slightly sweet flavor. Unlike regular white bread, this loaf stays fresh longer and has a silky, pull-apart structure that makes every slice feel luxurious.
What makes this bread special is a traditional Japanese technique called Tangzhong method, which involves cooking a portion of flour and liquid before mixing the dough. This simple step transforms the texture completely, giving you a moist, airy, and long-lasting loaf.
Why Japanese Milk Bread Is So Popular Worldwide
This bread has gained global attention for good reason. It’s one of the most searched homemade bread recipes because it offers:
- Ultra-soft and fluffy texture
- Slight sweetness perfect for breakfast or snacks
- Longer shelf life compared to regular bread
- Versatility for sweet and savory dishes
From toast and sandwiches to French toast and desserts, this bread adapts beautifully to any meal.
Understanding the Secret: Tangzhong Technique
The magic behind this bread lies in the Tangzhong method. This involves cooking flour with milk or water until it forms a thick paste.
Why It Works
- Pre-gelatinized starch holds more moisture
- Dough becomes easier to knead
- Bread stays soft for days
- Final texture becomes light and airy
This is why Japanese Milk Bread feels almost like a cross between bread and pastry.
Texture and Flavor Profile
When you bake this bread successfully, here’s what you can expect:
- A golden, glossy crust
- A soft, pillowy interior
- A slightly sweet and creamy flavor
- A stretchy, cotton-like crumb
Each slice pulls apart in soft layers, making it ideal for both eating plain and pairing with spreads.
Why This Recipe Is Perfect for Home Bakers
This recipe is ideal for beginners and experienced bakers alike because:
- It uses simple pantry ingredients
- It teaches essential baking skills
- It delivers professional-quality results
- It requires no special equipment
Making this bread at home is also a healthier alternative to store-bought bread, as you avoid preservatives and artificial additives.
Health and Nutritional Benefits
While this bread is soft and slightly rich, it still offers nutritional value:
- Provides carbohydrates for energy
- Contains protein from flour and eggs
- Includes healthy fats from butter and milk
Because you control the ingredients, you can adjust sugar, الدهون, or dairy to suit your dietary needs.
Step-by-Step Baking Science Explained
Understanding the process helps you achieve perfect results every time:
1. Creating the Starter Paste
This step locks in moisture and sets the foundation for soft bread.
2. Mixing the Dough
Combining wet and dry ingredients evenly ensures proper gluten formation.
3. Kneading for Gluten Development
Kneading builds elasticity, giving the bread its signature stretch.
4. First Rise (Fermentation)
Yeast works to create air pockets, making the bread light.
5. Shaping the Dough
Rolling and folding creates layers that improve texture.
6. Second Rise
This final proofing stage ensures a tall, fluffy loaf.
7. Baking
Proper temperature ensures even cooking and a golden crust.
Tips for Achieving Bakery-Level Results
- Use bread flour for better structure
- Ensure milk is warm, not hot, to protect yeast
- Knead until dough is smooth and elastic
- Allow enough time for both rises
- Avoid cutting the bread while hot
Creative Variations to Try
You can easily customize this recipe:
Sweet Options
- Add chocolate chips
- Include raisins or dried fruits
- Use honey instead of sugar
Savory Ideas
- Add cheese or herbs
- Use for sandwiches or sliders
Flavor Enhancements
- Add milk powder for richer taste
- Brush with butter after baking
Best Ways to Enjoy Japanese Milk Bread
This bread is incredibly versatile:
- Toast with butter and jam
- Make soft sandwiches
- Use for French toast
- Serve with tea or coffee
Its soft texture makes it perfect for both kids and adults.
Storage and Freshness Tips
- Store at room temperature for 2–3 days
- Keep in airtight packaging
- Freeze slices for longer storage
Thanks to the Tangzhong method, it stays soft longer than regular bread.
Nutritional Information (Per Slice Approx.)
- Calories: 195 kcal
- Fat: 6g
- Saturated Fat: 3.5g
- Carbohydrates: 30g
- Protein: 5g
- Fiber: 1g
- Sugar: 6g
Why This Recipe Stands Out
This Japanese Milk Bread recipe is not just about baking—it’s about creating something comforting, beautiful, and satisfying. It combines science, technique, and tradition to produce one of the softest breads you’ll ever taste.
Final Thoughts
Baking Japanese Milk Bread at home is a rewarding experience that brings warmth and joy to your kitchen. The process may take time, but the result is worth every step.
Once you master this recipe, it will become a staple in your home, whether for breakfast, snacks, or special occasions.
Part 2: Simple Japanese Milk Bread Recipe (Shokupan Style)
Ingredients
For Tangzhong (Starter Paste):
- 25g bread flour
- 120 ml whole milk or water
For Dough:
- 350g bread flour
- 60g sugar
- 7g instant yeast
- 5g salt
- 1 egg (room temperature)
- 120 ml warm milk
- 50g unsalted butter (softened)
- 10 ml oil (for greasing)
For Egg Wash:
- 1 egg
- 15 ml milk
Instructions
- In a saucepan, cook flour and milk until thick paste forms. Cool completely.
- In a bowl, mix flour, sugar, yeast, and salt.
- Add egg, warm milk, and Tangzhong paste. Mix into dough.
- Knead until smooth, then add butter gradually and knead until elastic.
- Place dough in greased bowl, cover, and let rise until doubled.
- Punch down dough and divide into equal portions.
- Roll each portion, fold, and shape into cylinders.
- Place in greased loaf pan and let rise again.
- Brush with egg wash.
- Bake at 175°C for 30–35 minutes until golden brown.
- Cool before slicing and serving.