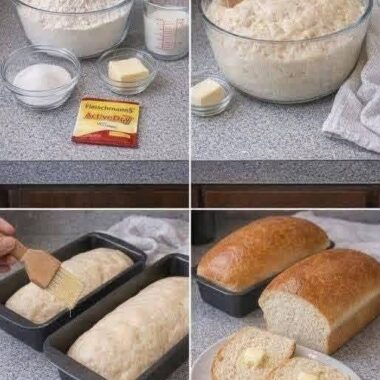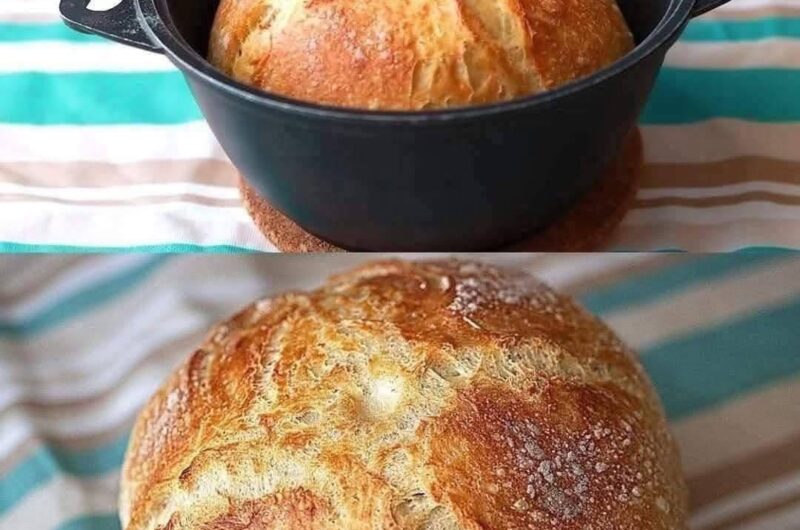
There is something incredibly satisfying about pulling a freshly baked loaf of bread from your own oven. The warm aroma filling the kitchen, the golden crust, and the soft interior create an experience that store-bought bread simply cannot match. For many people following a gluten-free lifestyle, however, baking homemade bread often feels intimidating. Traditional recipes usually require kneading, multiple rising stages, special techniques, and ingredients that can make the process seem complicated.
This Gluten-Free No-Knead Bread changes that completely. Designed for simplicity and dependable results, this recipe delivers a loaf that is light, tender, and easy to prepare without the need for kneading, eggs, or butter. Whether you’re living with celiac disease, managing gluten sensitivity, following a vegan diet, or simply looking for an allergy-friendly homemade bread, this recipe offers an excellent solution for everyday baking.
Instead of spending hours working with sticky dough or investing in expensive bread-making equipment, you simply mix the ingredients, transfer the batter into a loaf pan, allow it to rise, and bake. The result is a beautifully golden loaf with a soft crumb that is perfect for sandwiches, breakfast toast, soups, or your favorite spreads.
Because it uses everyday pantry ingredients, this homemade gluten-free bread recipe is ideal for beginners while still producing bakery-style results that experienced home bakers will appreciate.
Why Homemade Gluten-Free Bread Is Worth Making
Many commercially available gluten-free breads can be disappointing. While convenient, they often come with a long list of preservatives, stabilizers, artificial flavors, and added sugars to improve texture and shelf life. Despite these additions, many packaged loaves still turn out dry, crumbly, or overly dense.
Baking your own bread gives you complete control over every ingredient. You know exactly what goes into the loaf, allowing you to choose high-quality flour blends, healthier oils, and fresh yeast while avoiding unnecessary additives.
Another advantage is freshness. Homemade bread comes straight from the oven with a soft texture and rich flavor that is difficult to replicate in factory-produced loaves. Even the aroma alone makes baking at home worthwhile.
Preparing your own bread can also reduce grocery costs over time. Specialty gluten-free breads are often significantly more expensive than standard bread, while homemade versions typically produce larger loaves at a lower cost per slice.
What Makes This Bread Different from Traditional Bread Recipes?
Traditional bread relies on gluten to develop elasticity and structure. During kneading, gluten strands become stronger, allowing the dough to trap air created by the yeast. This process produces the chewy texture found in conventional wheat bread.
Since gluten-free flour does not contain these natural proteins, kneading is unnecessary. Instead, the recipe uses a quality gluten-free flour blend that already contains ingredients designed to mimic gluten’s structure.
The dough itself looks very different from classic bread dough. Rather than being firm enough to knead by hand, it resembles a thick batter. This consistency is completely normal and actually contributes to the loaf’s soft interior.
Once mixed, the batter is poured directly into the loaf pan where it rises before baking. The yeast creates tiny air pockets throughout the batter, producing a loaf that is surprisingly light despite containing no gluten.
A Wonderful Choice for Many Different Diets
One of the greatest strengths of this recipe is its versatility. It fits naturally into several popular eating plans without requiring major substitutions.
This bread is suitable for:
- Gluten-free diets
- Vegan lifestyles
- Egg-free baking
- Dairy-free meal plans
- Allergy-friendly cooking
- Beginner home baking
- Everyday family meals
Because there are no eggs or butter, it’s an excellent option for households managing multiple food allergies at once.
Understanding the Ingredients That Make This Bread Successful
Although the ingredient list is short, each item plays an important role in creating the loaf’s texture, flavor, and structure.
Gluten-Free Flour Blend
The flour blend forms the foundation of the recipe. High-quality all-purpose gluten-free flour blends usually combine rice flour, potato starch, tapioca starch, or similar ingredients to create balanced texture and flavor.
Many commercial blends already include xanthan gum, which acts as a binder and helps prevent crumbling. If your flour blend does not contain xanthan gum, adding approximately one teaspoon greatly improves the finished loaf.
Using a reliable flour blend also helps create consistent baking results from one loaf to the next.
Warm Water
Water activates the yeast and hydrates the flour.
The temperature is extremely important. Water that is too hot can kill the yeast, while cold water slows activation considerably.
Warm water encourages healthy fermentation, allowing the loaf to rise properly while maintaining a soft crumb.
Active Dry Yeast
Yeast is responsible for creating the light texture of the bread.
As it feeds on the sugar, it releases carbon dioxide, producing tiny air pockets that help the loaf expand during rising and baking.
Using fresh, active yeast is one of the most important factors in achieving a successful loaf.
Sugar or Honey
Only a small amount of sweetener is required.
Rather than making the bread noticeably sweet, the sugar primarily serves as food for the yeast during activation.
Honey works equally well if preferred, adding a subtle richness to the finished loaf.
Olive Oil
Since this recipe contains no butter, olive oil provides moisture and tenderness.
It also helps improve shelf life by keeping the crumb softer for longer after baking.
A mild extra virgin olive oil works particularly well because it complements the bread without overpowering its flavor.
Salt
Salt enhances every other ingredient while balancing the mild sweetness from the sugar or honey.
Without salt, gluten-free bread often tastes flat or bland.
It also helps strengthen the overall dough structure during baking.
Optional Ingredients That Improve Texture
Although the recipe works beautifully as written, a few optional ingredients can make it even better.
Chia Seeds or Flaxseed Meal
Both ingredients naturally absorb moisture, helping create a softer crumb while adding dietary fiber and plant-based nutrients.
They also provide gentle binding properties, improving sliceability.
Apple Cider Vinegar
A small amount of apple cider vinegar reacts with the yeast and supports better rise.
Many experienced gluten-free bakers use vinegar because it helps produce lighter, fluffier bread without changing the flavor.
Why This Recipe Is Perfect for Beginner Bakers
Many people avoid homemade bread because they assume it requires years of baking experience.
Fortunately, this recipe removes nearly all of the common challenges associated with bread making.
There is:
- No kneading
- No stand mixer required
- No complicated shaping
- No folding techniques
- No lengthy fermentation schedule
- No special bread flour needed
Everything is mixed in one bowl before being transferred directly into the loaf pan.
This straightforward process makes the recipe ideal for first-time bread bakers while still producing impressive results.
The Secret to a Soft, Airy Loaf
Although the recipe is simple, a few small techniques contribute to consistently successful bread.
Always measure the flour carefully to avoid a dry loaf.
Use fresh yeast that foams properly before mixing.
Allow enough rising time so the loaf becomes slightly puffy before baking.
Avoid overbaking, as gluten-free bread can dry out more quickly than traditional wheat bread.
Finally, let the loaf cool completely before slicing. Freshly baked gluten-free bread continues setting as it cools, resulting in cleaner slices and improved texture.
With its easy preparation, wholesome ingredients, and dependable results, this gluten-free no-knead bread is a recipe you’ll want to keep on hand for everyday meals, quick breakfasts, sandwiches, and family dinners. It proves that homemade gluten-free baking doesn’t have to be complicated to produce delicious, bakery-style bread.
Part 2: Easy Gluten-Free No-Knead Bread Recipe
Soft Homemade Vegan Gluten-Free Bread (No Eggs, No Butter, No Kneading)
Recipe Overview
- Recipe Type: Bread
- Cuisine: Gluten-Free, Vegan
- Difficulty Level: Easy
- Preparation Time: 10 minutes
- Rise Time: 30–45 minutes
- Baking Time: 40–45 minutes
- Total Time: About 1 hour 20 minutes
- Servings: 1 loaf (approximately 10–12 slices)
Ingredients
For the Bread Dough
- 2 cups gluten-free all-purpose flour blend (with xanthan gum)
(If your flour blend does not contain xanthan gum, add 1 teaspoon separately.) - 1½ cups warm water (not hot)
- 1 tablespoon sugar or honey
- 2¼ teaspoons active dry yeast (1 standard packet)
- 1 teaspoon salt
- 2 tablespoons extra virgin olive oil
Optional Ingredients for Better Texture
- 1 tablespoon chia seeds or flaxseed meal
- 1 tablespoon apple cider vinegar
Instructions
Step 1 – Activate the Yeast
In a medium mixing bowl, combine the warm water, sugar (or honey), and active dry yeast.
Let the mixture rest for 5–10 minutes until it becomes foamy. This indicates the yeast is active and ready for baking.
Step 2 – Prepare the Dough
Add the gluten-free flour blend, salt, olive oil, and the optional apple cider vinegar and chia seeds or flaxseed meal.
Using a sturdy spoon or spatula, stir everything together until a thick, sticky batter forms.
No kneading is required. The dough should resemble thick cake batter rather than traditional bread dough.
Step 3 – Let the Dough Rise
Lightly grease a standard loaf pan.
Transfer the batter into the prepared pan and smooth the surface using a damp spatula or the back of a wet spoon.
Cover loosely with a clean kitchen towel or plastic wrap and place the pan in a warm area.
Allow the dough to rise for 30–45 minutes, or until slightly puffed.
Step 4 – Bake
Preheat your oven to 375°F (190°C).
Bake the loaf for 40–45 minutes, or until:
- The crust is golden brown.
- The loaf feels firm.
- It sounds hollow when lightly tapped.
If the top begins browning too quickly, loosely cover it with aluminum foil during the final baking time.
Step 5 – Cool Before Serving
Remove the bread from the oven and allow it to cool in the pan for about 10 minutes.
Transfer it to a wire rack and let it cool completely before slicing.
Cooling helps the crumb set properly and prevents the loaf from crumbling.
Helpful Baking Tips
- Always use warm—not hot—water to activate the yeast successfully.
- Check that your gluten-free flour blend contains xanthan gum; if not, add 1 teaspoon for better structure.
- If the batter appears too thick, mix in 1–2 tablespoons of warm water.
- Apple cider vinegar helps produce a lighter, softer loaf.
- Wait until the bread has completely cooled before slicing for cleaner cuts.
- Toast leftover slices for an even better texture and flavor.
Easy Variations
Seeded Bread
Stir sunflower seeds, pumpkin seeds, or sesame seeds into the batter for extra crunch.
Herb Bread
Mix in dried rosemary, oregano, thyme, or Italian seasoning for a savory loaf.
Garlic Version
Add 1 teaspoon garlic powder or finely minced roasted garlic.
Whole Grain Style
Use part gluten-free oat flour if compatible with your gluten-free flour blend.
Sweet Breakfast Bread
Add a teaspoon of cinnamon and a few raisins for a lightly sweet loaf.
Storage Instructions
At Room Temperature
Store the cooled loaf in an airtight container or bread bag for 2–3 days.
Refrigerator
Keep refrigerated for up to 5 days. Warm or toast slices before serving.
Freezer
Slice the bread before freezing and store in a freezer-safe bag for up to 3 months. Toast slices directly from frozen as needed.
Approximate Nutrition (Per Slice)
- Calories: 140 kcal
- Protein: 3 g
- Carbohydrates: 25 g
- Fat: 4 g
- Fiber: 2 g
- Sugar: 2 g
- Sodium: 210 mg
Nutrition values are approximate and may vary depending on the flour blend and optional ingredients used.
Recipe Notes
- A gluten-free flour blend containing xanthan gum produces the best texture.
- The optional chia seeds or flaxseed meal improve moisture and help the loaf stay soft.
- Apple cider vinegar enhances the bread’s rise and creates a lighter crumb.
- This recipe is naturally gluten-free, egg-free, butter-free, and can be completely vegan when sugar is used instead of honey.
- The bread is ideal for sandwiches, toast, breakfast, soups, or everyday homemade baking.